
April Wilkerson’s Guide to Creating the Ultimate Outdoor Oasis Using Real Cedar
Welcome back to April Wilkerson’s informative and inspiring series on deck building. This home improvement series guides you through the process of constructing your own outdoor oasis using Real Cedar. We’ve already explored the initial stages of building a deck and installing an above-ground pool. Now, we move on to two key steps when it comes to giving your deck that finished, professional look: skirting and staining.
In this two-part instalment, we’ll first explore how April uses Western Red Cedar to create beautiful deck skirting that hides the underneath structure while enhancing the aesthetic appeal. As April shares, “I am so glad I went with Western Red Cedar for this build. I think it’s so striking and so beautiful.”
After mastering the art of deck skirting, we’ll transition into a step-by-step guide on staining your deck. Staining not only enhances the look of your cedar deck but also extends its life by providing added protection against weather elements. Plus, April gives invaluable tips on how to match the color of your new cedar deck with existing outdoor structures for a seamless visual experience.
Best Practices for Deck Skirting
Installing the First Board
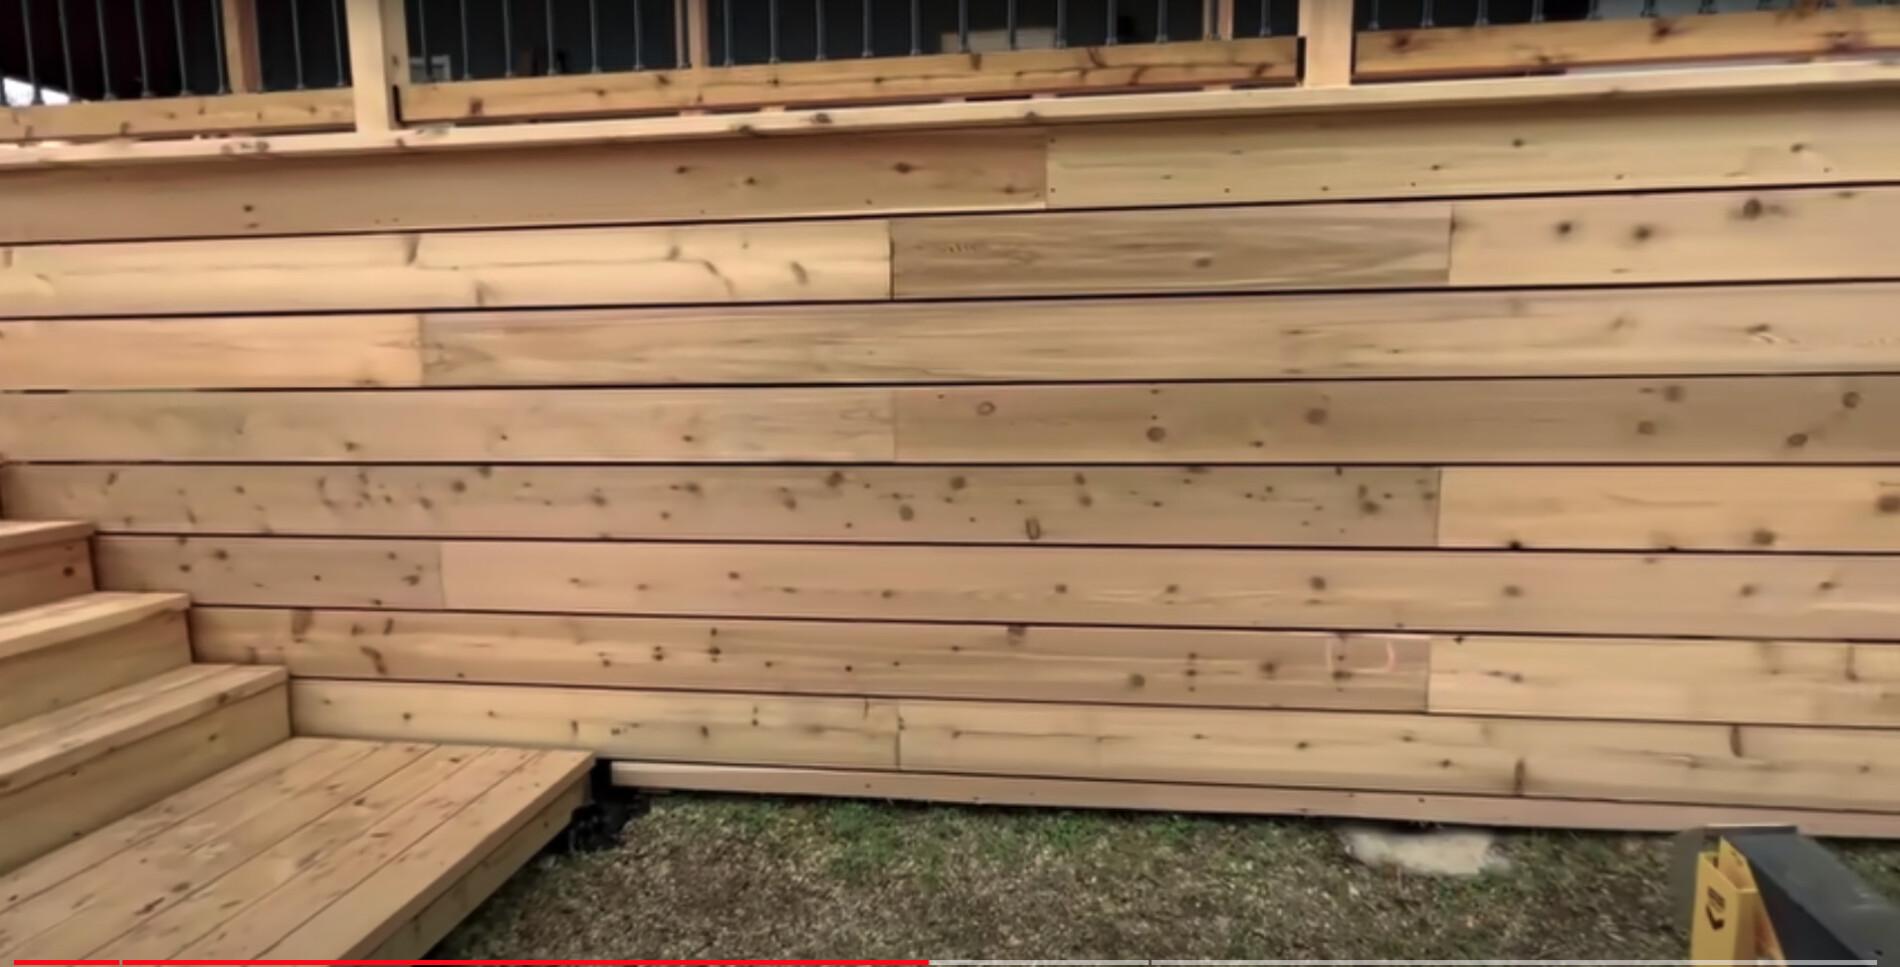
April begins by installing 1×8 Western Red Cedar boards. She aligns the first board at the end, leaving the post exposed. To attach the board, she uses a 15-gauge nailer. One key point April shares is about hardware selection. Instead of galvanized hardware, she recommends stainless steel to avoid rusty marks and drip stains when it gets wet.
Aligning and Measuring Boards
April measures from the top side instead of using spacers, since each board might have a slight variation. To camouflage the treated wood studs between the boards, she spray paints them black before attaching any boards.
The first few boards are full length. Then, when a board hits a stud, April cuts it off and splices it. To create staggered seams, she starts the next row with a short piece, followed by a long piece.
Planning Around the Stairs
April lines up the boards with the stairs for a continuous look, but mentions that choosing narrower or wider boards is a matter of personal preference. She also cuts around elements such as spigots.
Repeat on Backside and Handle Longer Sections
She repeats the process on the backside of the stairs, keeping in mind to stagger seams for longer sections. Again, April advises painting the front edge of each stud before starting the next row to maintain alignment.
Managing the Bottom Row
For the bottom row, April adds extra blocking where needed for nailing boards. She tapers off the bottom row to leave roughly two inches of space between the last board and the ground.
Handling Corners and Slopes
When dealing with corners, April advises to consider how the sides interact with the front. She leaves some boards longer so they can cover the end grain of the skirting. As for sloping ground, she tapers each bottom board to match the slope, creating an aesthetically pleasing look.
Staining Your Deck Like a Pro
Choosing Your Finish
April used an oil-based stain, which takes a few days to dry but gives excellent results. It’s good to know that Real Cedar is pitch and resin free, which means it accepts a wide range of finishes. So you can achieve any look and level of protection you like. Find the product for your project here.
Another option is to let it weather naturally, eventually turning a beautiful silvery gray patina. This, of course, is the lowest maintenance option.
Matching Existing Structures
If you want to match existing wood structures to your new Real Cedar deck, you’ll need to sand all the exposed existing components first. For this step, April recommends using a 4-inch belt sander. Her pro tip here is to sand diagonally to the grain for quick wood removal, then again with the grain.
Safety tip: She recommends wearing a mask or lightweight respirator for safety throughout this process to avoid inhaling wood and dust particles.
Prepping the Surfaces
Before moving onto staining, give the deck a thorough cleaning. However, never resort to power-washing as it can damage the wood fibers. You find more detailed care and maintenance instructions here.
Using Different Techniques
For large areas, April uses a sprayer to apply the stain herself so she can match old and new decking components. Before using the sprayer, she applies the stain with a lamb’s wool pad on areas like the railings that are easier to wipe on. She also keeps a chip brush handy to reach the nooks and crannies a pad can’t access.
If you have time, Real Cedar recommends applying the stain to all 6 sides of each board prior to construction. And for the lease labor intensive method, you can get your decking factory finished before construction begins.
Mapping out Section
She plans her path before starting, so she doesn’t step on freshly stained areas. April uses the deck boards as a guide when spraying, covering an entire board in one pass. Overlapping areas from multiple passes don’t need to worry you; she uses a lamb’s wool pad on a stick to smooth out any heavy areas after the entire top deck is stained.
Stay tuned for the next edition of this how-to series. Whether you’re an experienced DIYer or a novice, April’s step-by-step approach offers invaluable insights that can help turn your dream deck into a reality. Don’t miss it!