
Home Improvement Challenge of the Week

How to create front yard privacy in style with a modern trellis
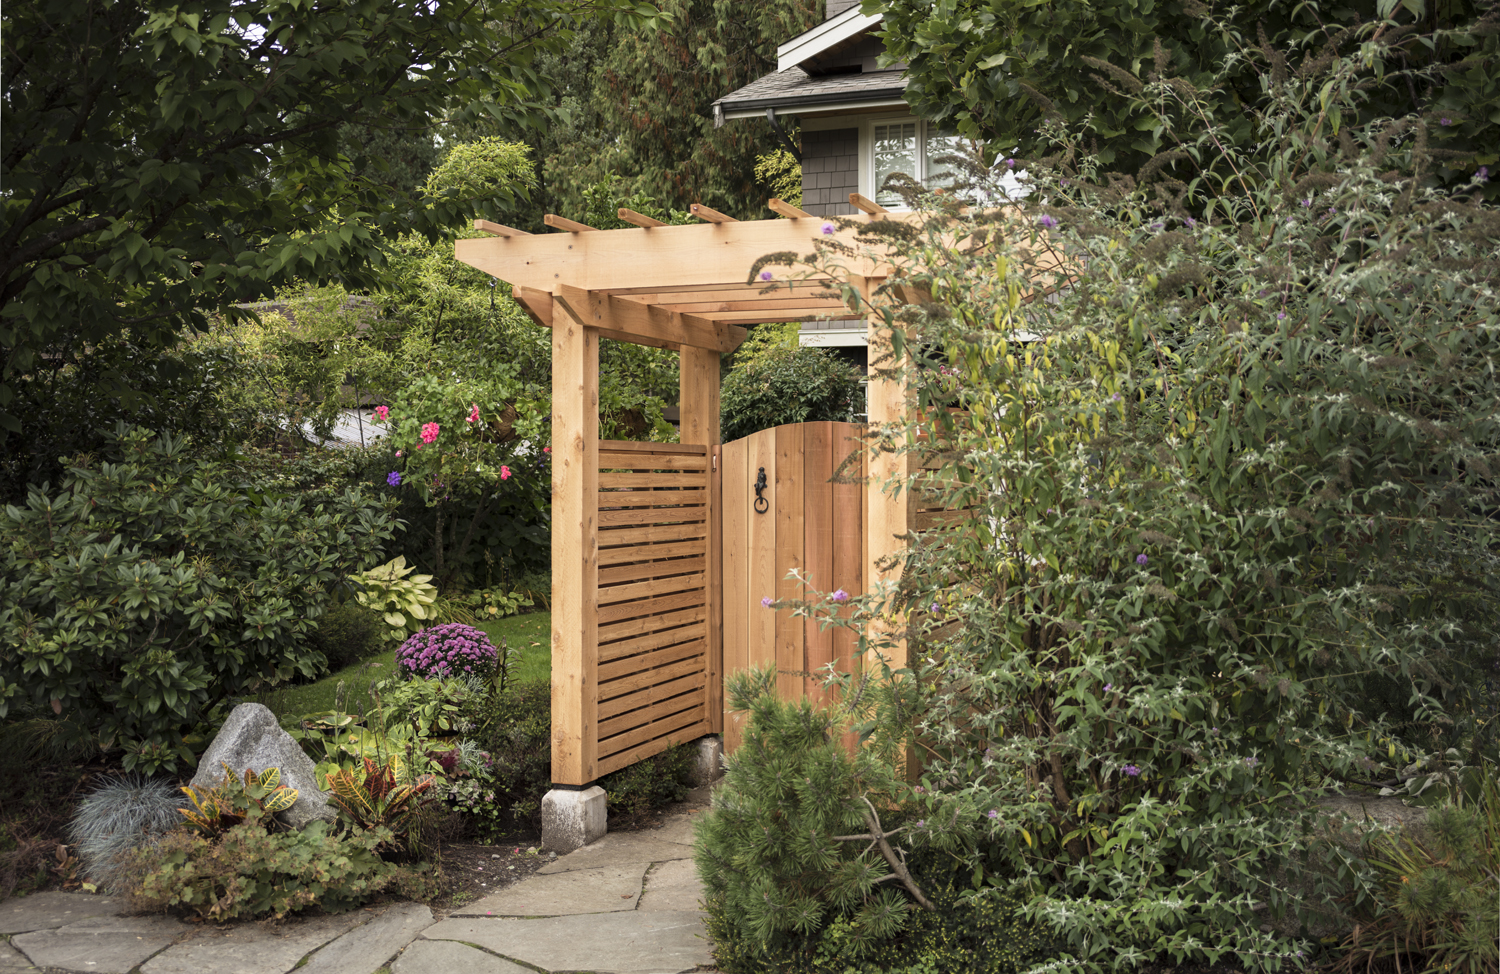
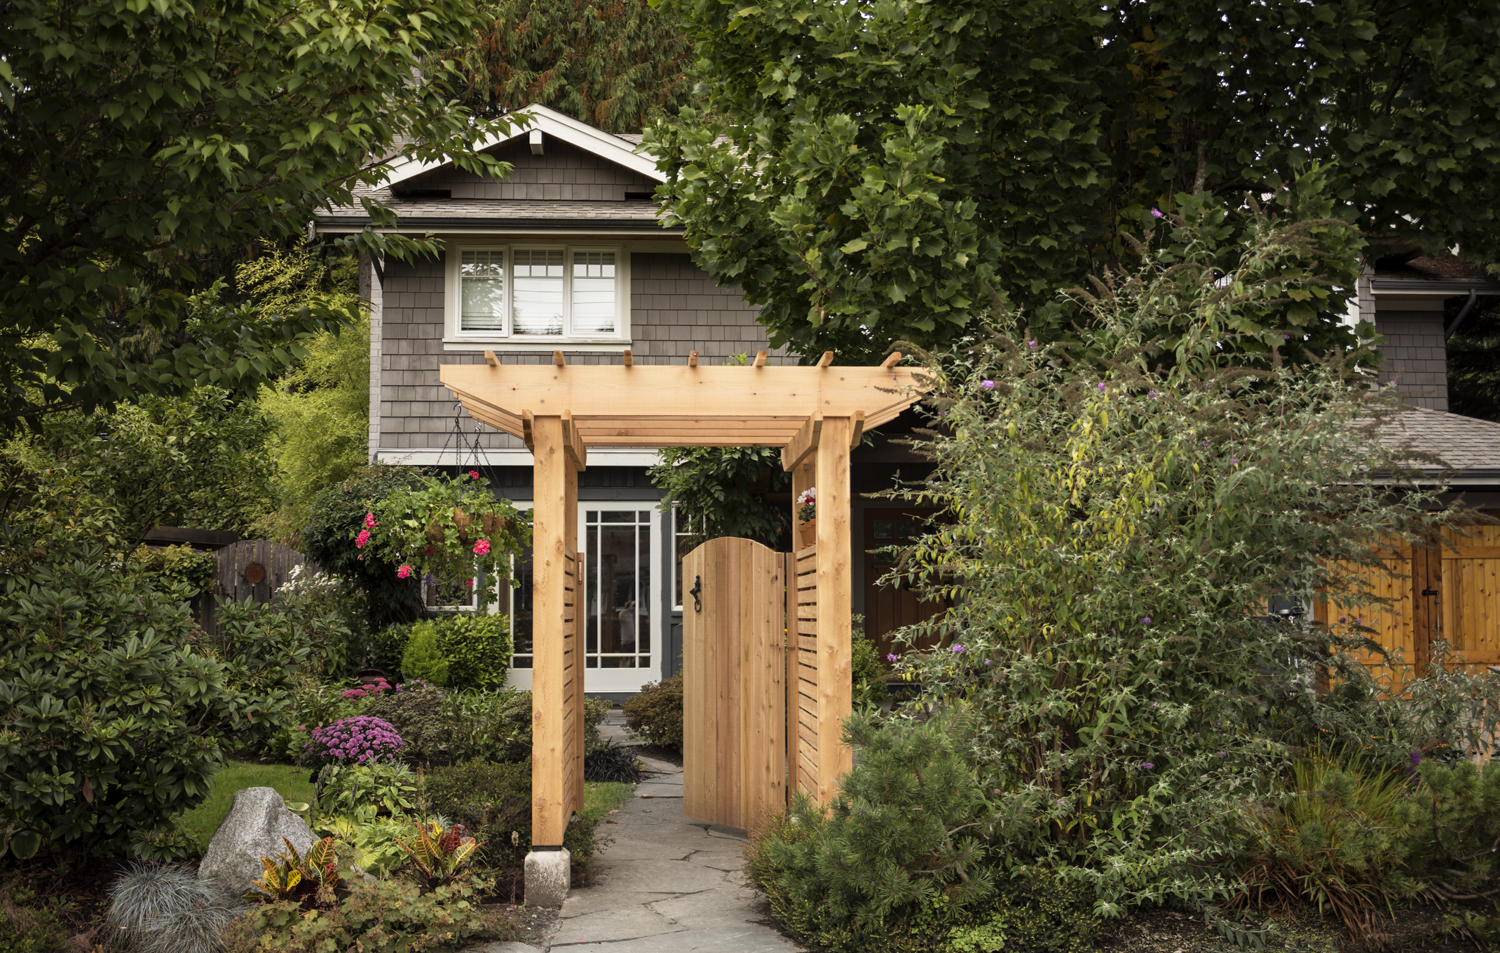
Like most contractors, Jim West of Westworks Construction is always working on various projects around his own home. No wonder curious passersby are always peering into his front yard to see what he’s building. He’s happy to show off his latest wood design creations. Problem is he has two little pugs who think they’re guard dogs. Something had to be done.
Building Challenge
Homeowner and professional builder, Jim West, was looking for a “soft privacy solution” that offered enough coverage that his pugs wouldn’t bark wildly every time someone drove by. But at the same time, he didn’t want an antisocial wall that closed him off from all his neighbors.
Building Solution
He designed a simple gated trellis. It’s a modern standalone structure, but instead of a fence, he’s going to plant shrubbery on either side. For this project he’s using his favorite building material: Western Red Cedar because as he puts it, “nothing looks, smells or feels quite like Western Red Cedar.” Furthermore, it’s naturally resistant to rot, decay and insects, making it ideal for all outdoor structures.
Learn more about cedar’s other amazing performance properties.
Step 1 – Pick a Foundation System
It’s perfectly acceptable with cedar to just dig a hole, put the post on a base stone and fill it with concrete, as you would a cedar fence. But in this case, because it’s a standalone and doesn’t involve fences, Jim’s treating it more like a structure, so he poured a concrete foundation with an upstand.
“It’s a design decision that serves two purposes,” explains Jim, an awarding winning contractor with more than 30 years’ experience building and designing beautiful outdoor structures. “The wood will perform better off the ground. Plus, it gives it a big chunky look and visually grounds the trellis.”
Prefer building a traditional looking trellis? Get free plans here.
Step 2 – Erect the Posts
You’ll probably need an extra set of hands here because the design calls for solid 6 X 6 cedar posts. You can choose between a crisp clean clear grade for a more polished look or you can opt for a beautiful knotty grade of Western Red Cedar, which will really add a lot of warmth and texture to the project. Plus, it’s a cost-effective choice.
“We chose knotty,” says Jim. “And for fasteners, we used an invisible fastening system because we didn’t want to mar the beauty of the 6 x6.”
View specifying guide for more details on how to select the best Real Cedar products for your project.
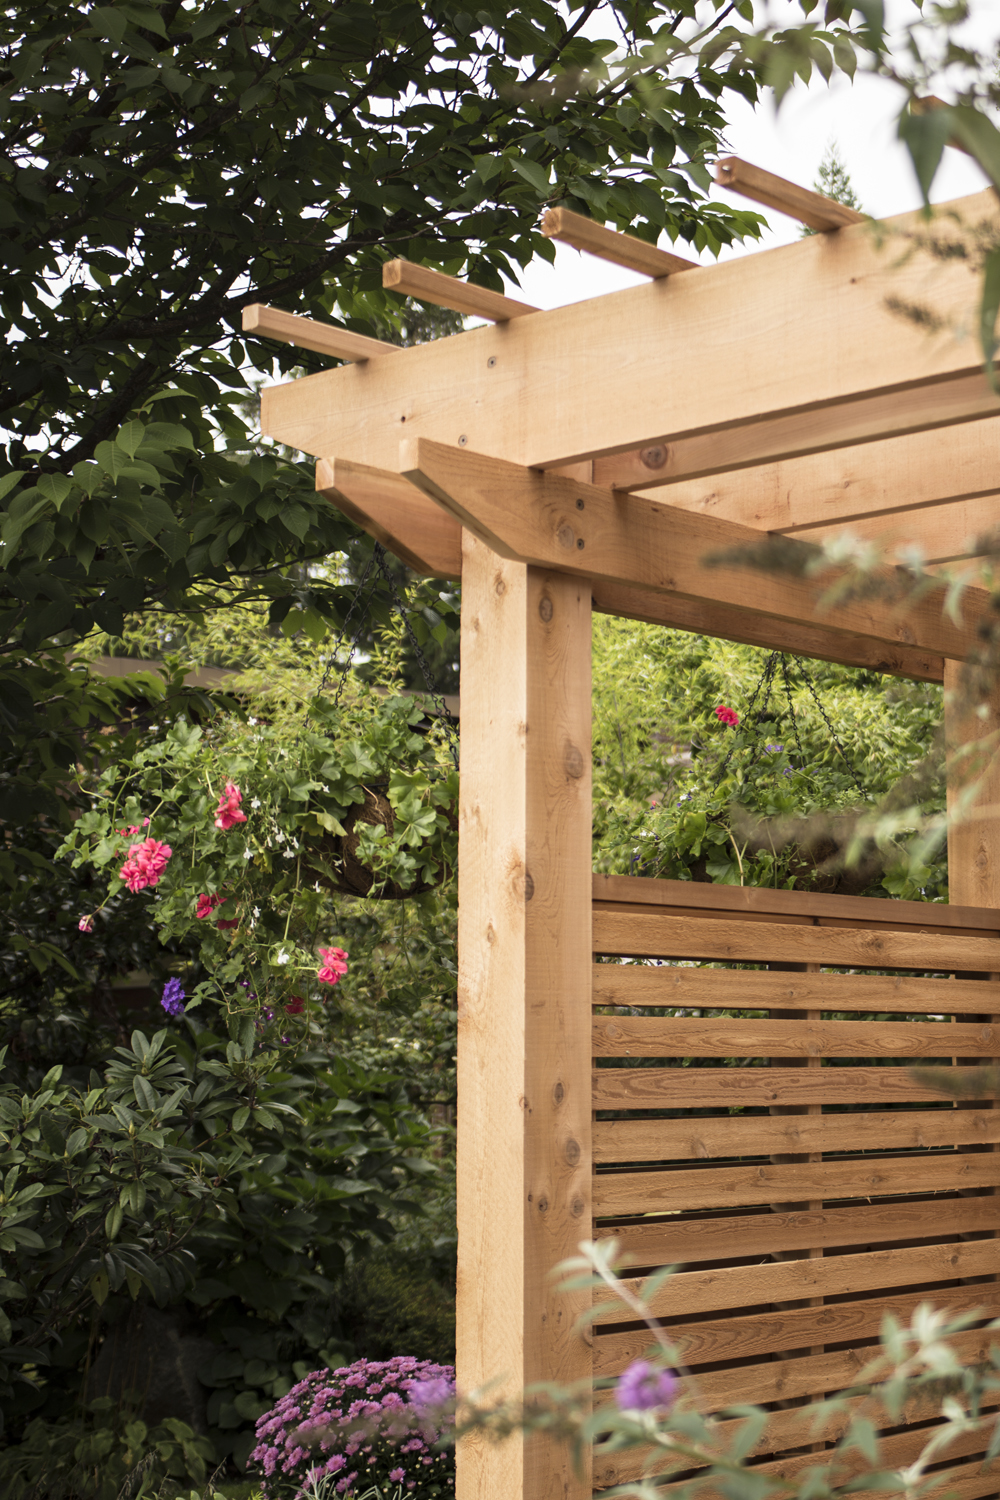
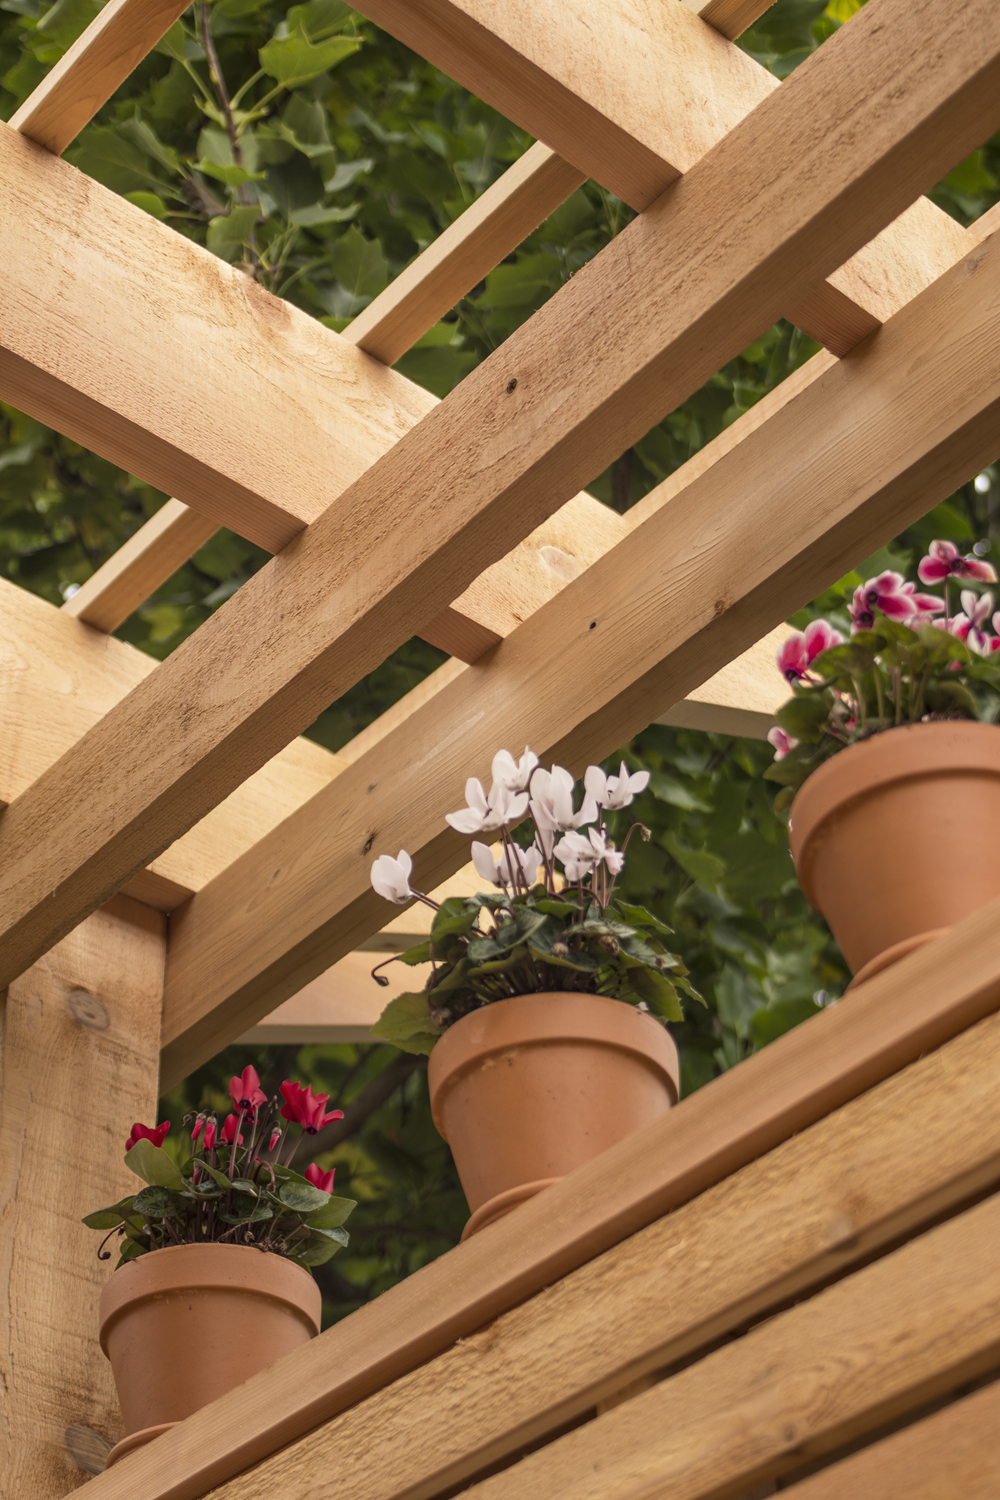
Step 3 – Add the Trellis
After installing the rafters, Jim added some purlins as well.
“It’s a good lightweight way to add lateral support for your rafters,” explains Jim. “It also helps support the vegetation we plan on growing on top of the unit.”
Looking for a trellis with a planter built right in? Check out these free, easy-to-follow plans.
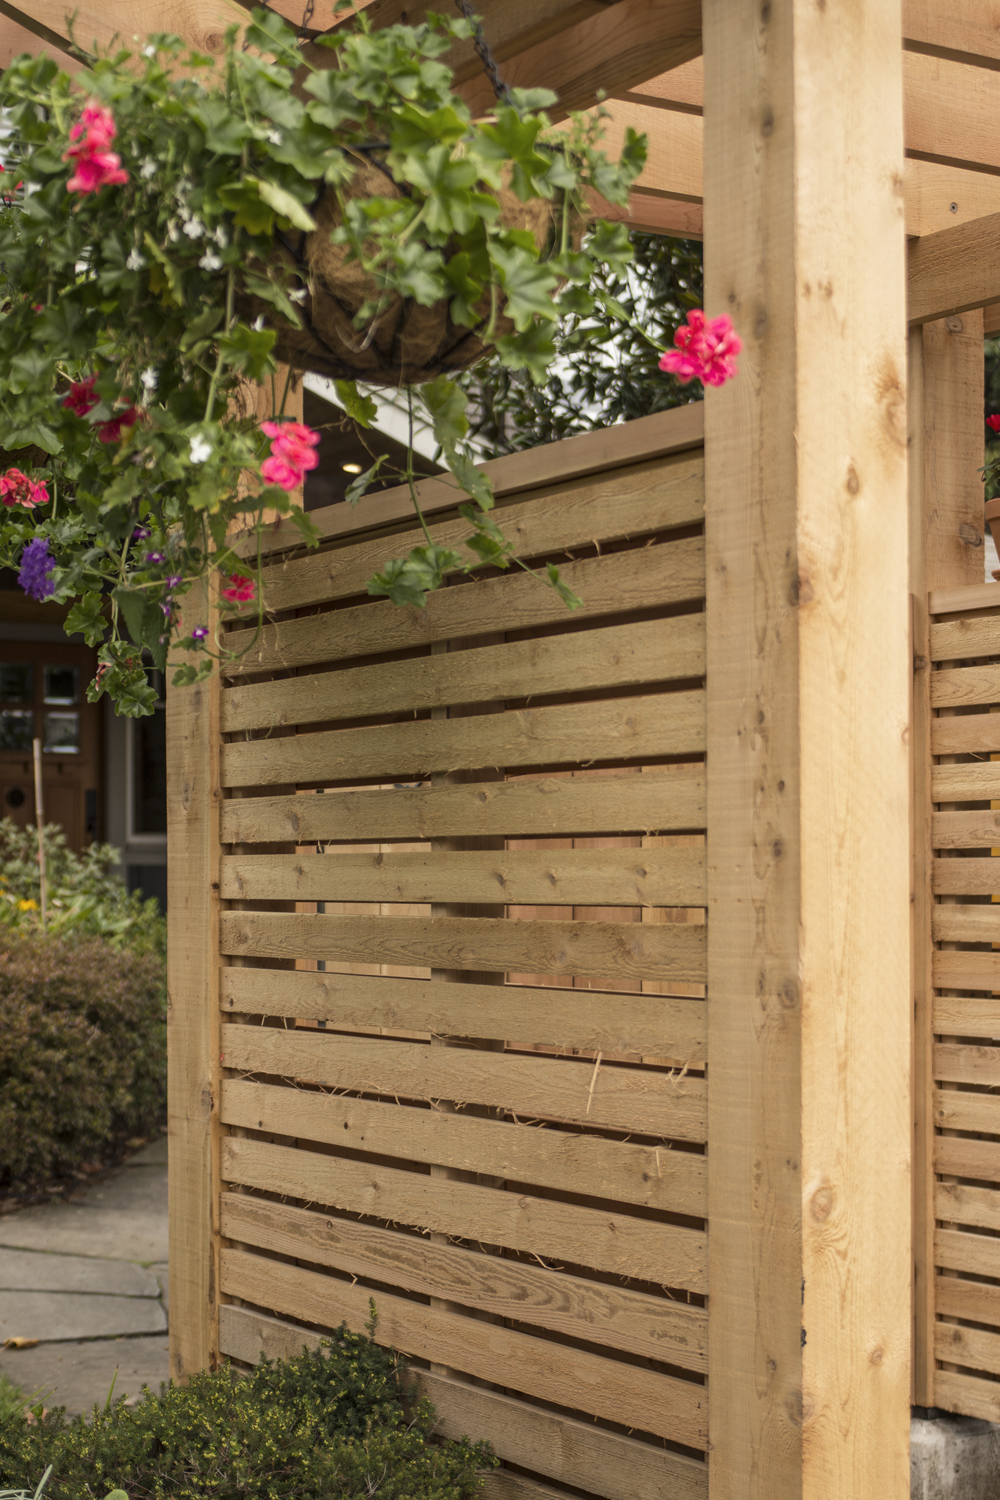
Step 4 – Build Side Panels
These screens are designed to visually lead you through to the gate. To make things easier, Jim recommends building the panel frames offsite and then installing them before attaching them in place. This is where you’ll really see the piece come together. The beautiful tonal range of the cedar slats creates a visual interest that simply can’t be duplicated with other building materials.
“Not only is Real Cedar beautiful, it’s extremely durable, and without a doubt, it’s our most requested lumber when it comes to decks and outdoor structures in general,” says Jim.
See how Real Cedar compares to composites when it comes to performance, appearance and environment.
Step 5 Build the Gate
Jim suggests building this component on a flat surface. Then, before installing, pencil an arc at the top for your saw to follow. The rounded top softens this bold contemporary structure. For finishing, Jim is going to let the trellis weather naturally, eventually turning a beautiful silvery grey patina. But it’s good to know that Real Cedar is pitch and resin free, which means it accepts and holds a wide range of finishes beautifully. So yes, yet again, Jim will be the envy of all his neighbors.
“And it was a pleasure to do because Western Red Cedar is so easy to work with,” says Jim. “It lays flat, it’s true and the tools love it.”
Choose the right finish for your project and learn how to apply your stain like a pro.
For more detailed instructions on how to build this trellis and other outdoor projects, you can download free PDF plans or SketchUp files from our DIY Center, and to find a quality Real Cedar supplier near you, visit our retailer locator.