
How to Build the Perfect Deck – Stairs Done Right
April Wilkerson’s Guide to Creating the Ultimate Outdoor Oasis Using Real Cedar
The journey to crafting your dream deck involves careful planning, informed material selection, and meticulous execution. Who better to guide you than home improvement expert, April Wilkerson? Throughout her video series, she breaks down each phase of deck construction. Having covered decking installation in the previous episodes, April now delves into outdoor staircase building in this third instalment.
April champions Real Cedar decking, not just for its undeniable aesthetic appeal, but for its natural properties. As April puts it, “The Western Red Cedar, with its resistance to rot, insects, and fungus, isn’t just stunning. It’s my go-to material for outdoor projects.”
This series, combining deck-building fundamentals and pro tips, offers you a unique learning experience. April’s step-by-step approach ensures that both experienced DIYers and novices can transform their dream deck into reality.
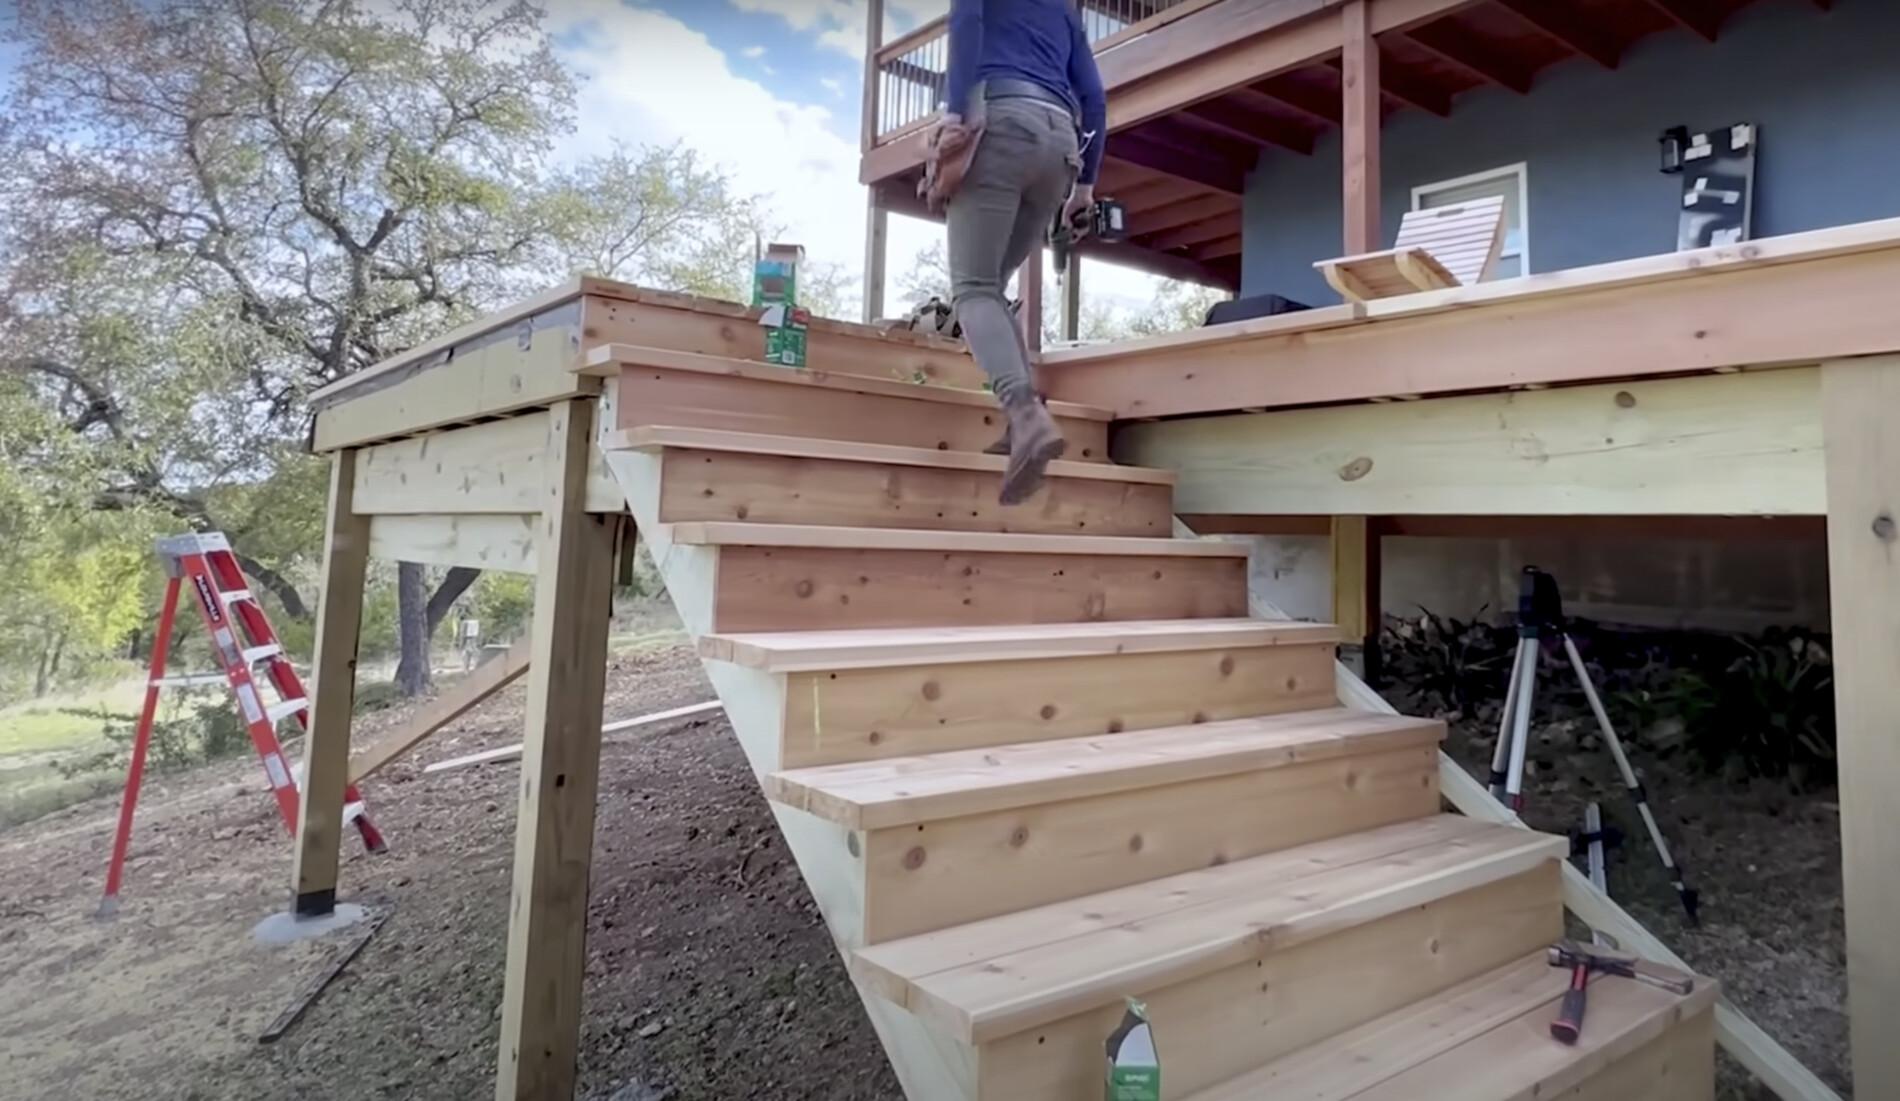
How to Build Stairs | The Easy Way
In the third video, April replaces a poorly constructed staircase with a durable, stunning alternative made of Western Red Cedar and pressure-treated wood. She uses pressure-treated wood for the staircase frame and a knotty grade of Western Red Cedar for the treads, harmonizing with her deck. Her key takeaways from this process are:
Start with a Solid Foundation
A solid foundation is critical. The posts should be set correctly with enough concrete that mounds slightly to shed water away. Quick-to-install post sleeves offer additional moisture protection.
Never Ignore a Landing
A robust landing extending past the last step by at least three feet is crucial for safety and stability. April recommends tough blocks for easy installation that don’t require deep holes or concrete mixing.
Protect Your Stringers with Joist Tape
Use joist tape to protect your stringers from moisture damage, extending their lifespan. Ensure to wrap it around the tail for maximum protection.
Ensure Secure Stringer-Rim Joist Connection
Don’t simply toe-nail the stringers to the rim joists. Use stringer hangers for a strong and secure connection.
Be Precise with Your Stringers
Choose treated 2x12s that are suitable for ground contact. These should be free from large knots or splits to ensure stability and longevity. If you’re hesitant about cutting your own stringers, consider using pre-cut ones, and remember that online calculators are available to help calculate the rise and run.
Calculate the Span Correctly
Ensure that you don’t leave more than six feet unsupported. Aim for stair stringers spaced 18” on center at maximum.
Proper Tread Installation
Treads should overhang between ¾” and 1 ¼” to prevent toe stubbing. Use a square to set the overhang correctly on both sides before screwing the board down. As for tread material, April highly recommends Western Red Cedar. Its stunning aesthetic, durability, and natural resistance to rot and insects make it an exceptional choice.
Risers are a Must
Avoid open risers as most building codes state the opening shouldn’t exceed 4”. Install a riser board on the vertical spots between the treads.
Choose the Right Hardware
Use corrosion-resistant fasteners like stainless screws. They’re more expensive but prevent corrosion and unsightly black streaks.
Protect Your Posts with Post Guards
Post guards protect your posts from damage, helping your staircase maintain its good looks for longer.
Stay tuned for April’s next video where she shares her expert tips and tricks for installing removable railings. You don’t want to miss this one!